MySQL Workbench - Connect to a Localhost
Connecting MySQL Workbench to a Localhost MySQL Instance
Learn how to establish a successful connection from MySQL Workbench to a local MySQL server, covering common configurations and troubleshooting tips.
MySQL Workbench is a powerful visual tool for database architects, developers, and DBAs. It provides capabilities for SQL development, database design, creation, and maintenance. One of its most common uses is connecting to a local MySQL server instance for development and testing. This article will guide you through the process of setting up a new connection to your localhost MySQL server.
Prerequisites for Connection
Before you can connect MySQL Workbench to your local MySQL server, ensure that the following prerequisites are met:
- MySQL Server Installation: You must have a MySQL server installed and running on your local machine. This could be a standalone installation, part of a WAMP/MAMP/XAMPP stack, or a Docker container.
- MySQL Workbench Installation: MySQL Workbench should be installed on the same machine.
- User Credentials: You need a valid MySQL user account (e.g.,
root) and its corresponding password. For security, it's recommended to create a dedicated user with appropriate permissions for development, rather than always usingroot. - Server Status: Verify that your MySQL server is actively running. You can usually check its status through your operating system's services manager or the control panel of your WAMP/MAMP/XAMPP stack.
flowchart TD
    A[Start] --> B{MySQL Server Running?}
    B -- No --> C[Start MySQL Server]
    B -- Yes --> D{MySQL Workbench Installed?}
    D -- No --> E[Install MySQL Workbench]
    D -- Yes --> F{User Credentials Available?}
    F -- No --> G[Create MySQL User]
    F -- Yes --> H[Proceed to Connect]
    C --> B
    E --> D
    G --> F
Prerequisites Flow for MySQL Workbench Connection
Creating a New Localhost Connection
Follow these steps to configure a new connection in MySQL Workbench to your local MySQL server. This process involves specifying the connection parameters, including the hostname, port, username, and password.
1. Open MySQL Workbench
Launch MySQL Workbench. You will typically see the 'Welcome to MySQL Workbench' screen or a list of existing connections.
2. Add a New Connection
Click on the '+' icon next to 'MySQL Connections' in the Home screen to open the 'Setup New Connection' dialog.
3. Configure Connection Parameters
In the 'Setup New Connection' dialog, fill in the following details:
- Connection Name: Provide a descriptive name, e.g.,
Local MySQLorMy Development Server. - Connection Method: Keep this as 'Standard (TCP/IP)'.
- Hostname: For a local server, this is typically
127.0.0.1orlocalhost. - Port: The default MySQL port is
3306. If your server uses a different port, specify it here. - Username: Enter the MySQL username, e.g.,
root. - Password: Click the 'Store in Keychain...' button to enter and securely save your password. This prevents you from having to type it every time you connect.
4. Test the Connection
Click the 'Test Connection' button. If your server is running and credentials are correct, you should see a 'Successfully made the MySQL connection' message. If not, review the troubleshooting section below.
5. Save the Connection
Once the connection test is successful, click 'OK' to save the connection. It will now appear on your MySQL Workbench Home screen. Double-click it to open an SQL editor and start working with your database.
root user for daily development tasks. Instead, create a new user with specific privileges for your development database(s). This limits potential damage if your credentials are compromised.Common Connection Issues and Troubleshooting
Even with correct steps, you might encounter issues. Here are some common problems and their solutions:
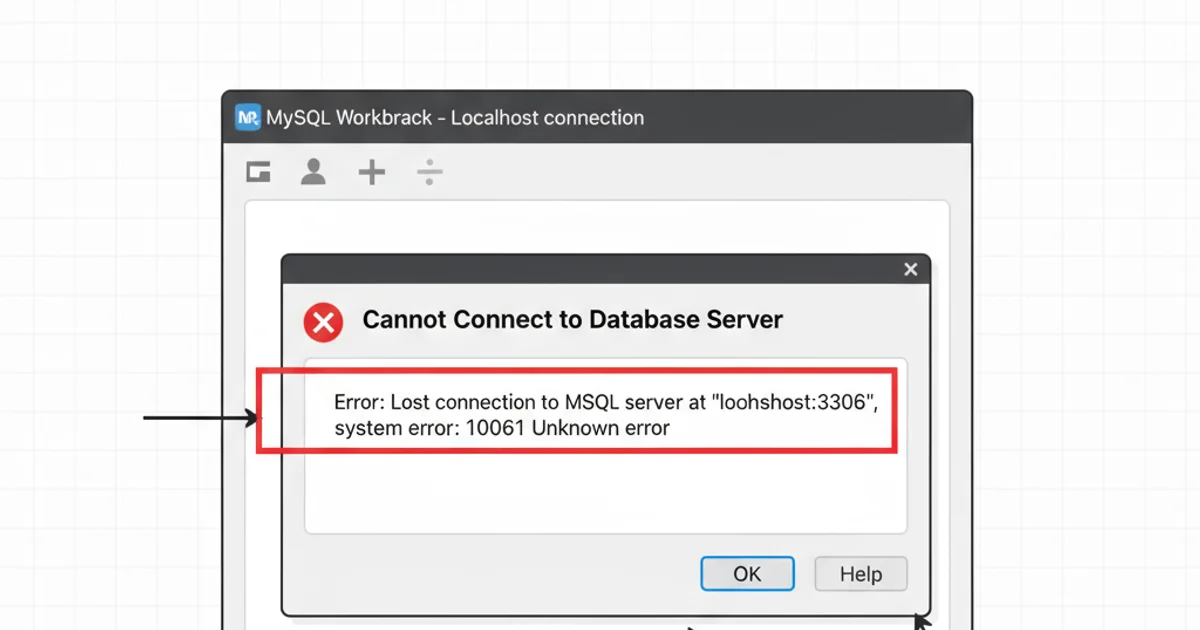
Example of a connection error message in MySQL Workbench.
1. Can't connect to MySQL server on '127.0.0.1' (10061)
This error usually means the MySQL server is not running or is not accessible at the specified hostname and port.
- Solution: Verify that your MySQL server is running. Check your operating system's services (Windows Services,
systemctl status mysqlon Linux) or your WAMP/MAMP/XAMPP control panel. If it's not running, start it.
2. Access denied for user 'your_user'@'localhost' (using password: YES)
This indicates incorrect username or password.
- Solution: Double-check the username and password you entered. Ensure there are no typos. If you're unsure, you might need to reset the password for the user or create a new user.
3. Host 'your_ip_address' is not allowed to connect to this MySQL server
This error occurs if the MySQL user is configured to only allow connections from specific hosts, and your current IP address (even if local) doesn't match.
- Solution: Ensure the MySQL user you're using is configured to allow connections from
localhostor127.0.0.1. You might need to grant privileges like this (replaceyour_userandyour_password):
CREATE USER 'your_user'@'localhost' IDENTIFIED BY 'your_password';
GRANT ALL PRIVILEGES ON *.* TO 'your_user'@'localhost' WITH GRANT OPTION;
FLUSH PRIVILEGES;
Granting privileges to a new user for localhost access.
Alternatively, if the user already exists, you can alter it:
ALTER USER 'your_user'@'localhost' IDENTIFIED BY 'new_password';
FLUSH PRIVILEGES;
Altering an existing user's password and flushing privileges.
4. Firewall Blocking Connection
Sometimes, a firewall (either your operating system's or a third-party one) might block the connection to port 3306.
- Solution: Temporarily disable your firewall to test if it's the culprit. If the connection works, you'll need to add an exception for port 3306 (TCP) in your firewall settings.