How to use Git Revert
Categories:
Mastering Git Revert: Undoing Changes Safely
Learn how to use git revert to undo commits without rewriting history, ensuring a clean and collaborative workflow.
In the world of version control, mistakes happen. Whether you've introduced a bug, committed sensitive information, or simply changed your mind about a feature, Git provides powerful tools to manage your project's history. Among these, git revert stands out as a safe and non-destructive way to undo changes. Unlike git reset, which rewrites history, git revert creates a new commit that undoes the effects of a previous commit, preserving the project's integrity and making it ideal for shared repositories.
Understanding Git Revert vs. Git Reset
Before diving into git revert, it's crucial to understand its distinction from git reset. Both commands can undo changes, but they do so in fundamentally different ways, with significant implications for collaboration and history management.
flowchart TD
    A[Original Commit] --> B[Bad Commit]
    B --> C[Good Commit]

    subgraph Git Revert
        C --> D{git revert B}
        D --> E[New Revert Commit]
        E --"History Preserved"--> F[Collaborative]
    end

    subgraph Git Reset
        C --> G{git reset --hard B}
        G --"Rewrites History"--> H[Local Only]
        H --"Removes C"--> I[Potentially Destructive]
    end

    style F fill:#ddf,stroke:#333,stroke-width:2px
    style I fill:#fdd,stroke:#333,stroke-width:2px
Comparison of Git Revert and Git Reset
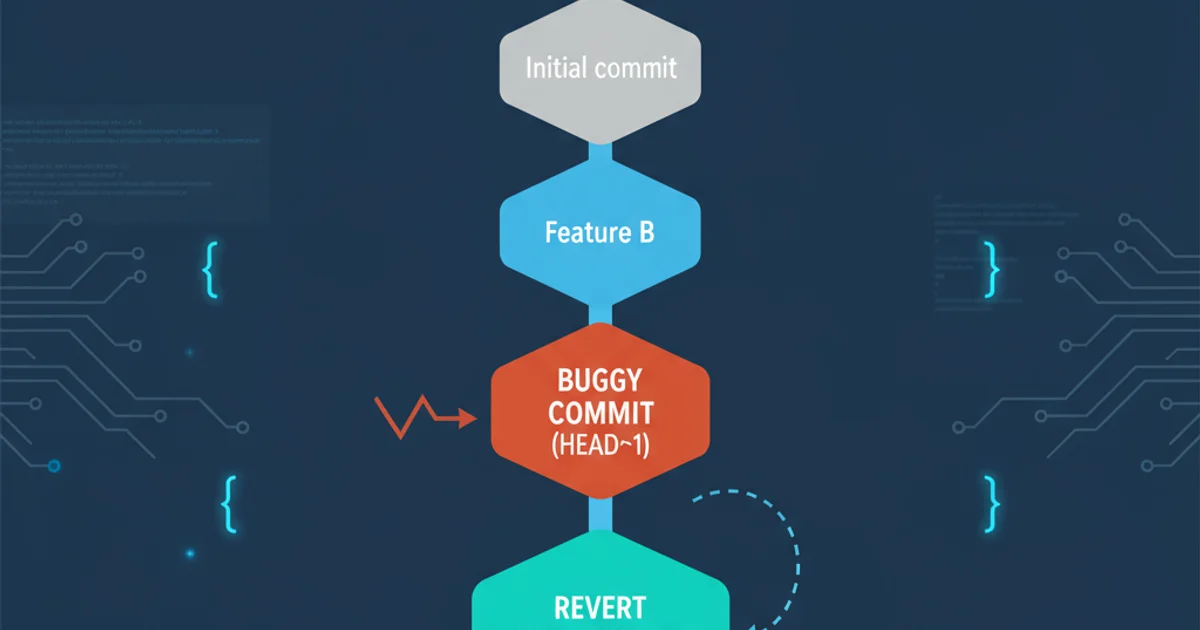
git revert creates a new commit that reverses the changes introduced by a specified commit. The original commit remains in the history, and the revert commit effectively cancels out its effects. This approach is non-destructive and safe for commits that have already been pushed to a shared remote repository, as it doesn't alter the existing history. It's the preferred method for undoing changes in collaborative environments.
Conversely, git reset moves the branch pointer to a previous commit, effectively removing subsequent commits from the history (depending on the reset mode). If these commits have already been pushed, using git reset and then force-pushing (git push --force) can cause significant problems for other collaborators who have based their work on the 'removed' history. Therefore, git reset is generally reserved for local, unpushed changes.
How to Use Git Revert
Using git revert is straightforward. You typically need the commit hash of the commit you wish to undo. You can find this hash using git log.
git log --oneline
View a concise log of your commit history to find the commit hash.
Once you have the commit hash, you can revert it. Let's say you want to revert a commit with the hash abcdef1.
git revert abcdef1
Reverting a single commit.
When you run this command, Git will open your default text editor (like Vim or Nano) to allow you to edit the commit message for the new revert commit. By default, it will pre-populate a message indicating which commit is being reverted. You can accept the default or modify it to provide more context.
--no-edit flag: git revert abcdef1 --no-edit.Reverting Multiple Commits
You can also revert a range of commits. When reverting a range, Git applies the reverts in reverse order of the commits, ensuring that dependencies are handled correctly. This means if you revert commits A, B, and C, Git will first revert C, then B, then A, creating a separate revert commit for each.
git revert HEAD~3..HEAD~1
Reverting commits from HEAD3 up to (but not including) HEAD1. This would revert the 3rd and 2nd last commits.
Alternatively, you can revert multiple specific commits by listing their hashes:
git revert abcdef1 fedcba9 1234567
Reverting multiple specific commits by their hashes.
-m or --mainline option to specify which parent branch is the 'mainline' or 'first parent'. For example: git revert -m 1 <merge-commit-hash>.Handling Conflicts During Revert
Just like with merging or rebasing, reverting a commit can sometimes lead to merge conflicts. This happens if the changes introduced by the commit being reverted conflict with subsequent changes in the history. When conflicts occur, Git will pause the revert process and notify you.
1. Resolve Conflicts
Open the conflicting files in your editor. You will see conflict markers (<<<<<<<, =======, >>>>>>>). Manually edit the files to resolve the conflicts, choosing which changes to keep or how to combine them.
2. Stage Resolved Files
After resolving conflicts in all affected files, stage them using git add <file>. This tells Git that you've handled the conflicts.
3. Continue the Revert
Once all conflicts are resolved and staged, continue the revert process with git revert --continue. Git will then create the revert commit.
4. Abort Revert (Optional)
If you decide not to proceed with the revert after encountering conflicts, you can abort the process using git revert --abort. This will return your working directory and staging area to the state they were in before you started the revert.
git pull) before performing a git revert on a shared branch to minimize the chances of merge conflicts.