editing a gif file in gimp stops the animation
Categories:
Preserving GIF Animations in GIMP: A Comprehensive Guide
Learn why editing GIF files in GIMP can stop animation and discover effective techniques to maintain your animated images.
GIMP (GNU Image Manipulation Program) is a powerful open-source image editor, but working with animated GIFs can sometimes be tricky. A common issue users encounter is that after editing a GIF in GIMP, the animation stops working. This article delves into the reasons behind this behavior and provides practical solutions to ensure your animated GIFs remain dynamic after editing.
Understanding GIF Animation in GIMP
Animated GIFs are essentially a series of individual frames displayed in sequence. In GIMP, each frame of an animated GIF is represented as a separate layer. The animation properties, such as frame delay and disposal method, are often stored in the layer names or metadata. When you open a GIF in GIMP, it imports these layers. However, when you perform edits, especially those that alter the layer structure or properties without proper handling, GIMP might not re-export the animation information correctly.
flowchart TD
    A[Open GIF in GIMP] --> B{GIMP interprets layers as frames}
    B --> C{User edits layers/frames}
    C --> D{Save/Export as GIF}
    D --> E{Animation Lost?}
    E -- Yes --> F[Incorrect Export Settings]
    E -- Yes --> G[Layer Name/Metadata Altered]
    E -- No --> H[Animation Preserved]
Workflow of GIF editing in GIMP and potential animation loss points.
Common Causes for Animation Loss
Several factors can lead to your GIF animation stopping after GIMP edits:
- Incorrect Export Settings: The most frequent culprit is choosing the wrong options in the 'Export Image as GIF' dialog. GIMP offers choices for animation, looping, and frame disposal that directly impact the final output.
- Flattening or Merging Layers: If you flatten the image or merge layers that represent different frames, you effectively combine multiple frames into one, destroying the animation sequence.
- Altering Layer Names: GIMP often stores frame delay information within the layer names (e.g.,
Layer Name (100ms)). Renaming these layers can strip this crucial metadata. - Adding New Layers Incorrectly: Simply adding a new layer without duplicating it across all existing frames can disrupt the animation flow, as the new layer might only appear on a single frame or not be treated as part of the animation sequence.
- Using Filters/Operations on Entire Image: Applying filters or operations to the entire image rather than individual layers (frames) can lead to inconsistencies or loss of animation data.
Solutions and Best Practices for Editing GIFs
To successfully edit GIFs in GIMP and retain their animation, follow these guidelines:
1. Edit Frames Individually
Treat each layer as a distinct frame. If you need to make a change that affects all frames (e.g., adding a border, adjusting colors), apply it to each layer separately or use layer groups and masks carefully.
2. Preserve Layer Naming Conventions
When GIMP imports a GIF, it often names layers like Frame 1 (100ms) (replace). The (100ms) indicates the frame delay, and (replace) is the disposal method. Avoid renaming these parts of the layer name unless you explicitly know what you're doing.
3. Correct Export Settings
This is critical. When exporting, ensure you select the correct options.
1. Open the GIF
Go to File > Open and select your animated GIF.
2. Make Your Edits
Perform your desired edits. Remember to apply changes to individual layers if they are frame-specific. For global changes, consider duplicating the layer, applying the change, and then merging it down to each frame, or using layer masks.
3. Export as GIF
Go to File > Export As.... In the dialog, choose 'GIF image' as the file type and click 'Export'.
4. Configure GIF Export Options
In the 'Export Image as GIF' dialog, ensure the following: * As animation: Check this box. * Loop forever: Check this if you want the GIF to loop continuously. * Delay between frames where unspecified: Set a default delay if some frames don't have one specified in their layer names. * Frame disposal where unspecified: Usually, 'I do not care' or 'Combine with preceding frame (replace)' works well. If you're unsure, 'I do not care' is often a safe default.
5. Final Export
Click 'Export' to save your animated GIF.
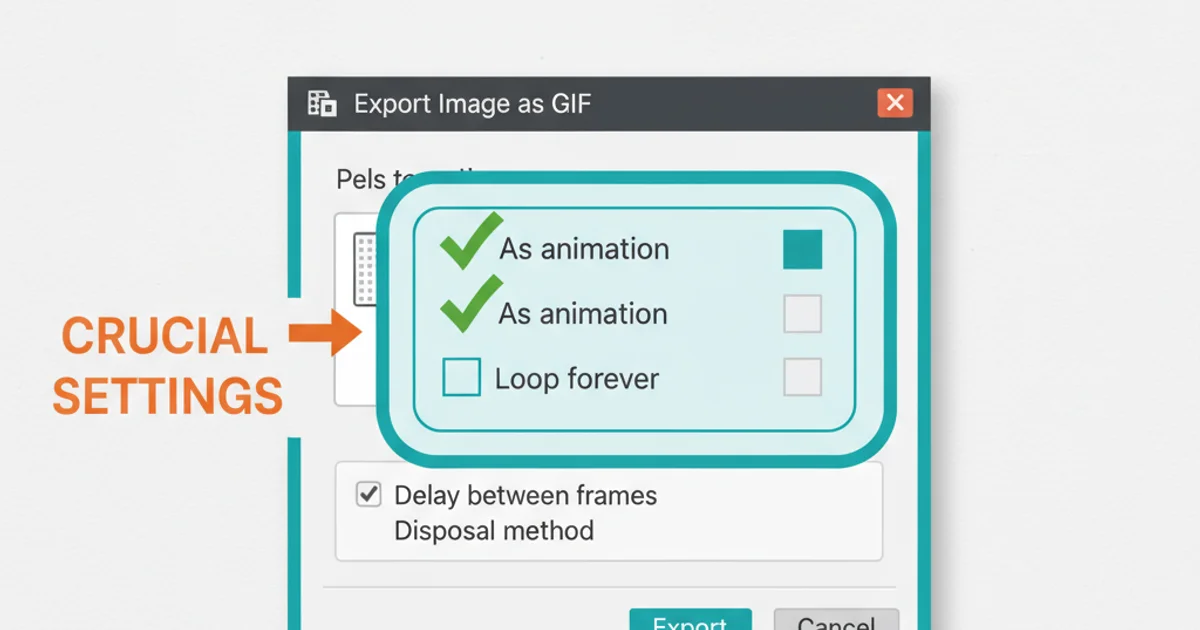
Crucial export settings for preserving GIF animation in GIMP.
Advanced Techniques: Adding a Border to an Animated GIF
Adding a border to an animated GIF without losing animation requires careful handling of layers. Here's a common approach:
1. Open GIF and Expand Canvas
Open your GIF in GIMP. Go to Image > Canvas Size.... Increase the width and height by the desired border thickness (e.g., if you want a 5px border, add 10px to both width and height). Make sure 'Center' is checked to add space equally around the image. Click 'Resize'.
2. Create a New Layer for the Border
Create a new transparent layer (Layer > New Layer...). Drag this new layer to the bottom of your layer stack in the Layers dialog.
3. Fill the Border Layer
Select the new bottom layer. Use the Bucket Fill tool to fill this layer with your desired border color. This layer will now act as the background border for all frames.
4. Export
Export the image as a GIF, ensuring 'As animation' is checked and other animation settings are correct, as described in the previous section.