The easy way to built Google Chrome extension
Categories:
The Easy Way to Build Your First Google Chrome Extension
Learn how to create a simple yet functional Google Chrome extension from scratch, covering manifest, background scripts, and content scripts.
Google Chrome extensions are powerful tools that can enhance your browsing experience, automate tasks, and integrate web services directly into your browser. Building one might seem daunting at first, but with a clear understanding of the core components, you can create your own functional extension in no time. This guide will walk you through the essential steps to develop a basic Chrome extension.
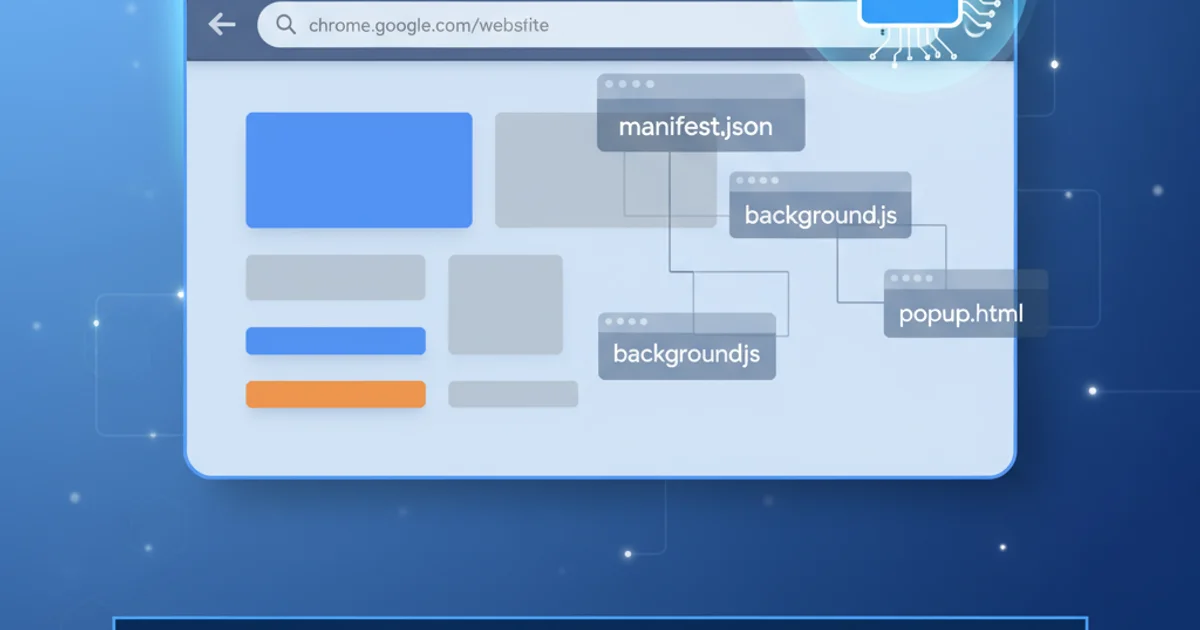
Understanding Chrome Extension Architecture
Before diving into code, it's crucial to grasp the fundamental architecture of a Chrome extension. Every extension is built upon a few key files that dictate its behavior, permissions, and user interface. The manifest.json file is the heart of your extension, declaring its metadata and capabilities. Other important components include background scripts for persistent logic, content scripts for interacting with web pages, and optionally, a popup UI.
flowchart TD
    A[User Action/Browser Event] --> B{Background Script (eventPage.js)}
    B --> C{API Calls (chrome.* APIs)}
    C --> D[Modify Browser Behavior]
    B --> E{Content Script (content.js)}
    E --> F[Interact with Web Page DOM]
    F --> G[Send Message to Background Script]
    G --> B
    H[Popup UI (popup.html)] --> I{Popup Script (popup.js)}
    I --> C
    I --> G
Simplified Chrome Extension Architecture Flow
Setting Up Your Extension: The Manifest File
The manifest.json file is the first thing Chrome reads when an extension is loaded. It defines the extension's name, version, permissions, and specifies which scripts and pages to load. For Chrome extensions, you'll typically use Manifest V3, which introduces enhanced security and performance features. Here's a basic manifest.json structure:
{
  "manifest_version": 3,
  "name": "My First Extension",
  "version": "1.0",
  "description": "A simple Chrome extension.",
  "icons": {
    "16": "images/icon-16.png",
    "48": "images/icon-48.png",
    "128": "images/icon-128.png"
  },
  "action": {
    "default_popup": "popup.html",
    "default_icon": {
      "16": "images/icon-16.png",
      "24": "images/icon-24.png",
      "32": "images/icon-32.png"
    }
  },
  "permissions": [
    "activeTab",
    "scripting"
  ],
  "host_permissions": [
    "<all_urls>"
  ]
}
Basic manifest.json for a Manifest V3 extension.
Adding Functionality: Background and Content Scripts
Extensions often need to perform tasks in the background or interact directly with the web page a user is viewing. This is where background scripts and content scripts come into play.
Background Scripts: These run in the background and handle events, manage state, and interact with Chrome APIs. They are typically event-driven and only active when needed, conserving resources.
Content Scripts: These are JavaScript files that run in the context of web pages. They can read and modify the DOM, but they run in an isolated world, meaning they don't interfere with the page's own JavaScript.
// background.js
chrome.runtime.onInstalled.addListener(() => {
  console.log('My First Extension installed.');
});

chrome.action.onClicked.addListener((tab) => {
  chrome.scripting.executeScript({
    target: { tabId: tab.id },
    function: () => {
      alert('Hello from your Chrome Extension!');
    }
  });
});
A simple background.js that alerts a message when the extension icon is clicked.
// content.js (This would be injected by a background script or declared in manifest)
console.log('Content script loaded on this page.');

// Example: Change the background color of the body
document.body.style.backgroundColor = 'lightblue';

// Example: Listen for messages from the background script
chrome.runtime.onMessage.addListener((message, sender, sendResponse) => {
  if (message.action === 'highlight') {
    document.body.style.backgroundColor = 'yellow';
    sendResponse({ status: 'highlighted' });
  }
});
An example content.js that modifies the page and listens for messages.
chrome.scripting.executeScript from a background script, rather than being declared directly in the manifest for all URLs.Creating a Popup User Interface
Many extensions provide a small user interface that appears when the extension icon is clicked. This is typically an HTML file (popup.html) with its own JavaScript (popup.js).
<!-- popup.html -->
<!DOCTYPE html>
<html>
<head>
  <title>My Extension Popup</title>
  <style>
    body { width: 200px; padding: 10px; font-family: sans-serif; }
    button { width: 100%; padding: 8px; margin-top: 10px; }
  </style>
</head>
<body>
  <h1>Hello Extension!</h1>
  <button id="greetButton">Greet Page</button>
  <script src="popup.js"></script>
</body>
</html>
Basic popup.html with a button.
// popup.js
document.getElementById('greetButton').addEventListener('click', () => {
  chrome.tabs.query({ active: true, currentWindow: true }, (tabs) => {
    chrome.scripting.executeScript({
      target: { tabId: tabs[0].id },
      function: () => {
        alert('Greetings from the popup!');
      }
    });
  });
});
The popup.js script that sends an alert to the active tab.
1. Step 1: Create Project Directory
Create a new folder for your extension, e.g., my-first-extension.
2. Step 2: Add Manifest File
Inside your project folder, create a file named manifest.json and paste the basic manifest code provided above. Remember to create an images subfolder and add some placeholder icons (e.g., icon-16.png, icon-48.png, icon-128.png).
3. Step 3: Create Background Script
Create background.js in your project root and add the background script code. Update your manifest.json to include "background": { "service_worker": "background.js" }.
4. Step 4: Develop Popup UI
Create popup.html and popup.js in your project root and add the respective code. Ensure manifest.json has "action": { "default_popup": "popup.html" }.
5. Step 5: Load Extension in Chrome
Open Chrome, navigate to chrome://extensions, enable 'Developer mode' (top right), click 'Load unpacked', and select your extension's folder. Your extension should now appear in the toolbar.
6. Step 6: Test Your Extension
Click on your extension's icon in the Chrome toolbar. The popup should appear, and clicking the button should trigger an alert on the active tab.