What is the difference between pip and Conda?
Categories:
Pip vs. Conda: Understanding Python Package and Environment Management

Explore the fundamental differences between pip and Conda, two powerful tools for managing Python packages and environments. Learn when to use each and how they can coexist.
In the Python ecosystem, managing packages and their dependencies is crucial for reproducible development. Two prominent tools often discussed in this context are pip and Conda. While both serve to install libraries, they operate at different levels and have distinct philosophies. Understanding their differences is key to efficient and conflict-free Python development, especially when dealing with complex scientific computing or data science projects.
What is Pip?
pip (Pip Installs Packages) is the standard package installer for Python. It's primarily designed to install packages from the Python Package Index (PyPI) and other Python package indexes. pip manages Python packages specifically, focusing on Python-based libraries and their Python dependencies. It does not handle non-Python dependencies (like C/C++ libraries) or environment management directly.
python -m pip install some-package
python -m pip freeze > requirements.txt
python -m pip install -r requirements.txt
Common pip commands for installing packages and managing requirements.
flowchart TD
    A[Developer] --> B[pip install package]
    B --> C{PyPI}
    C --> D[Download Python Package]
    D --> E[Install into Python Environment]
    E --> F[Application Uses Package]
Simplified workflow of pip installing a Python package from PyPI.
What is Conda?
Conda is an open-source package and environment management system that runs on Windows, macOS, and Linux. It was created for Python programs but can package and distribute software for any language. Unlike pip, Conda is language-agnostic and can manage non-Python dependencies, system libraries, and even entire software stacks. It also excels at creating and managing isolated environments, allowing you to have different versions of Python and packages for different projects without conflicts.
conda create -n myenv python=3.9 numpy pandas
conda activate myenv
conda install scipy
conda deactivate
Basic Conda commands for environment and package management.
flowchart TD
    A[Developer] --> B[conda create -n myenv]
    B --> C{Conda Channels (e.g., Anaconda, Conda-forge)}
    C --> D[Download Python, Non-Python Packages]
    D --> E[Create Isolated Environment]
    E --> F[conda activate myenv]
    F --> G[Application Uses Packages & Python Version]
Conda's comprehensive package and environment management workflow.
Key Differences and When to Use Each
The core distinction lies in their scope. pip is a Python package manager; Conda is a language-agnostic package and environment manager. This means Conda can install Python, non-Python libraries (like MKL, HDF5, GDAL), and manage entire environments, while pip is limited to Python packages within an existing Python installation. For data science, machine learning, or projects requiring specific versions of system libraries, Conda often provides a more robust and reliable solution. For general Python development where only Python packages are needed, pip is perfectly adequate.
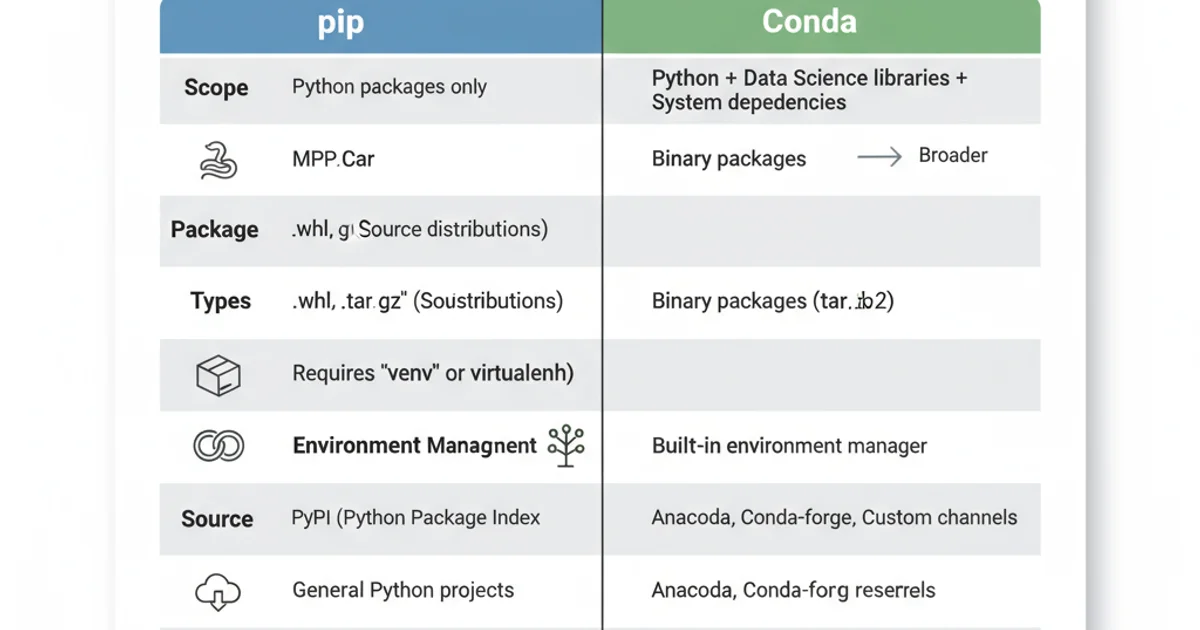
A summary of the key differences between pip and Conda.
pip within a Conda environment. If Conda doesn't have a specific package, you can activate your Conda environment and then use pip install to get the package from PyPI. However, always try to use conda install first to leverage Conda's dependency resolution.Can They Coexist?
Yes, pip and Conda can coexist and are often used together. The recommended approach is to create a Conda environment first, specifying the Python version and any major non-Python dependencies. Once the Conda environment is active, you can then use pip to install any remaining Python-specific packages that are not available through Conda channels. This ensures that Conda handles the foundational environment and complex binary dependencies, while pip fills in the gaps for pure Python packages.
1. Create a Conda Environment
Use conda create -n my_project_env python=3.10 to set up a new environment with a specific Python version.
2. Activate the Environment
Run conda activate my_project_env to switch to your newly created environment.
3. Install Core Dependencies with Conda
Install major libraries like NumPy, SciPy, or TensorFlow using conda install numpy scipy tensorflow.
4. Install Remaining Python Packages with Pip
If a package isn't on Conda, use pip install some-pure-python-package within the active Conda environment.
5. Deactivate the Environment
When done, use conda deactivate to exit the environment.