How to test data layer variables in Google Tag Manager?
Categories:
Mastering Data Layer Variable Testing in Google Tag Manager
Learn essential techniques and tools to effectively test your data layer variables in Google Tag Manager, ensuring accurate data collection and robust tag firing.
The data layer is the backbone of effective data collection in Google Tag Manager (GTM). It's a JavaScript object that holds all the information you want to pass from your website to GTM. Properly testing these data layer variables is crucial to ensure your tags fire correctly and collect accurate data. This article will guide you through various methods and best practices for testing your data layer variables.
Understanding the Data Layer
Before diving into testing, it's important to grasp what the data layer is and how it works. The data layer is an array of JavaScript objects that GTM uses to read information. When an event occurs on your website (e.g., a page view, a product added to cart, a form submission), relevant data can be pushed into this data layer. GTM then listens for these pushes and uses the data to populate variables and trigger tags.
window.dataLayer = window.dataLayer || [];
window.dataLayer.push({
  'event': 'pageView',
  'pageCategory': 'Product Page',
  'productName': 'Example Widget',
  'productPrice': 99.99
});
Example of pushing data to the data layer.
flowchart TD
    A[Website Action] --> B{"dataLayer.push()"}
    B --> C[Data Layer Object]
    C --> D[GTM Listener]
    D --> E{"GTM Variable (e.g., 'Data Layer Variable')"}
    E --> F[GTM Trigger Evaluation]
    F --> G[Tag Firing]
How data flows from website actions to GTM tags via the data layer.
Method 1: Using GTM's Preview Mode
GTM's built-in Preview Mode is your primary tool for real-time data layer testing. It allows you to browse your website as if GTM were live, but with a debugger pane showing exactly what's happening behind the scenes. This is invaluable for verifying data layer pushes and variable values.
1. Enable Preview Mode
In your GTM container, click the 'Preview' button in the top right corner. This will open your website in a new tab with the GTM debugger pane at the bottom.
2. Navigate and Interact
Browse your website and perform actions that are expected to push data to the data layer (e.g., view a product, add to cart, complete a purchase).
3. Inspect the Debugger
In the GTM debugger pane, navigate to the 'Data Layer' tab. Here, you'll see a chronological list of all data layer pushes. Click on each event to inspect the data layer state at that specific moment.
4. Verify Variable Values
Go to the 'Variables' tab in the debugger. Select an event from the left-hand 'Summary' pane. This tab will show you the values of all GTM variables (including your Data Layer Variables) at the time of that event. Confirm that your data layer variables are populated with the expected values.
Method 2: Browser Developer Tools Console
For a more granular and immediate inspection, the browser's developer console (usually accessed by pressing F12 or right-clicking and selecting 'Inspect') is an excellent resource. You can directly query the dataLayer object.
// To view the entire dataLayer array:
console.log(dataLayer);

// To view the last pushed object:
console.log(dataLayer[dataLayer.length - 1]);

// To check a specific variable's value (if it's in the last push):
console.log(dataLayer[dataLayer.length - 1].productName);
Using the browser console to inspect the data layer.
dataLayer object in the console shows the current state. If you're looking for historical values, GTM's Preview Mode is more effective as it captures each push chronologically.Method 3: Browser Extensions
Several browser extensions can simplify data layer inspection, offering a more user-friendly interface than the raw console output. While GTM's Preview Mode is generally sufficient, these extensions can provide quick insights.
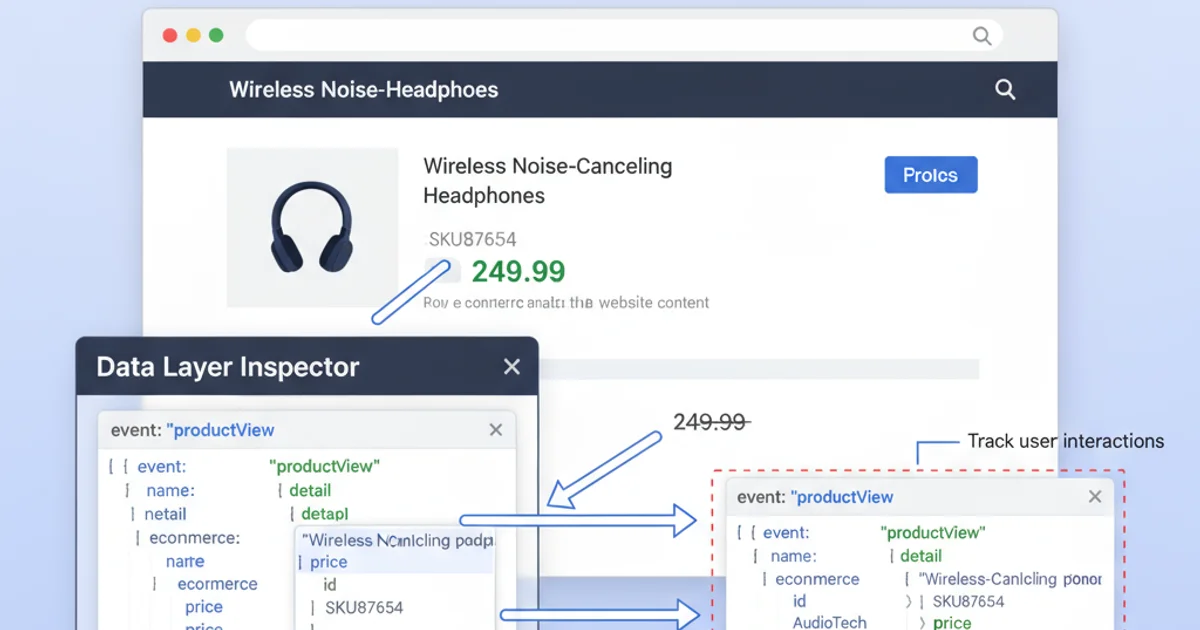
Example of a browser extension visualizing data layer pushes.
Common Data Layer Testing Scenarios
When testing, consider these common scenarios to ensure comprehensive coverage:
- Page Views: Verify that
pageCategory,pageType,pagePath, etc., are correctly pushed on different page types (home, product, category, checkout). - E-commerce Events: Test
addToCart,removeFromCart,checkout,purchaseevents, ensuring product details (ID, name, price, quantity) are accurate. - Form Submissions: Confirm that form data (e.g.,
formName,formStatus) is captured upon successful submission. - User Interactions: Check custom events for clicks, video plays, or other interactions, ensuring relevant attributes are present.
- Edge Cases: Test scenarios like empty carts, out-of-stock products, or error pages to see how your data layer handles them.