Override USER AGENT STYLE SHEET - Chrome
Categories:
Overriding Chrome's User Agent Stylesheets: A Comprehensive Guide
Learn how to inspect, understand, and effectively override the default styles applied by Chrome's user agent stylesheet, gaining full control over your web page's appearance.
Every web browser comes with a default set of styles, known as the 'user agent stylesheet.' These styles dictate how basic HTML elements (like <h1>, <p>, <a>, <button>) are rendered before any custom CSS is applied. While these defaults provide a baseline, developers often need to override them to achieve a consistent and custom design across their applications. This article will guide you through identifying user agent styles in Chrome and demonstrate the best practices for overriding them effectively.
Understanding User Agent Styles
User agent stylesheets are the browser's built-in CSS rules. They ensure that even a plain HTML document without any custom styling is still readable and functional. For example, they define the default font size for headings, the margin around paragraphs, or the blue color and underline for links. While helpful, these default styles can sometimes interfere with your design intentions, making it crucial to know how to identify and override them.
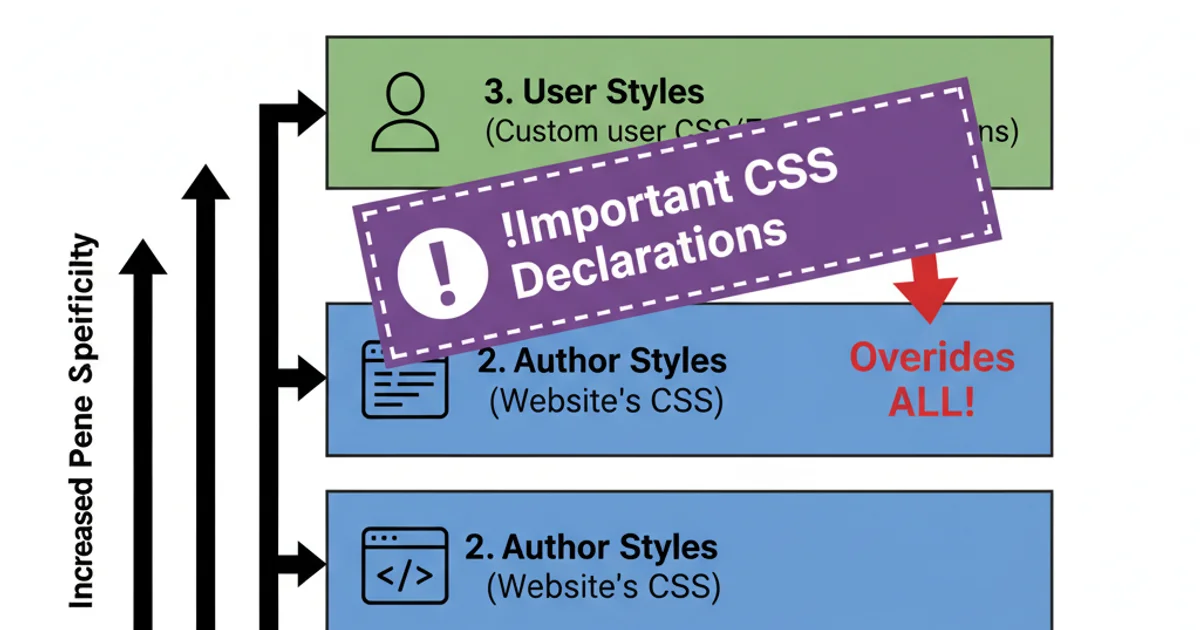
The CSS Cascade: How styles are applied and overridden.
Inspecting User Agent Styles in Chrome DevTools
Chrome DevTools provides powerful features to inspect and understand the styles applied to any element, including those coming from the user agent stylesheet. This is your primary tool for diagnosing styling issues and determining which default styles you need to target.
1. Open DevTools
Right-click on the element you want to inspect and select 'Inspect' or press F12 (Windows/Linux) / Cmd + Opt + I (macOS).
2. Navigate to the Styles Pane
In the DevTools panel, ensure the 'Elements' tab is selected, and then look for the 'Styles' sub-pane on the right-hand side.
3. Identify User Agent Styles
Scroll through the 'Styles' pane. You'll see various style rules listed. Rules originating from the user agent stylesheet are typically labeled with user agent stylesheet next to them. These are often grayed out or have a lower priority than your custom styles, but they are still present and can be overridden.
4. Toggle Styles
You can temporarily disable individual user agent styles by unchecking the checkbox next to them in the 'Styles' pane. This helps you see the immediate effect of removing a default style.
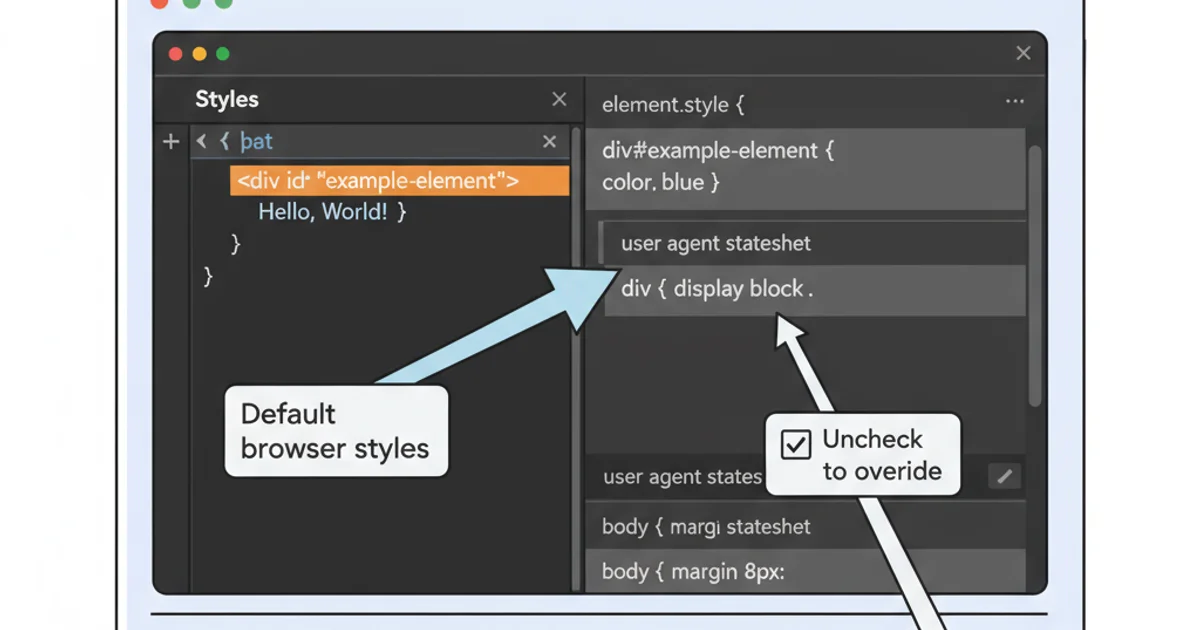
Identifying 'user agent stylesheet' rules in Chrome DevTools.
Effective Strategies for Overriding User Agent Styles
The key to overriding user agent styles is understanding CSS specificity and the cascade. Your custom styles will take precedence if they are more specific or appear later in the stylesheet than the user agent's rules. Here are the most common and recommended approaches:
1. Using Element Selectors (Basic Overrides)
For simple overrides, directly targeting the HTML element with a type selector is often sufficient. This works well for resetting basic properties like margins, paddings, or font sizes.
/* Override default margin for paragraphs */
p {
  margin-top: 0;
  margin-bottom: 1em;
}

/* Reset default button styles */
button {
  background-color: #007bff;
  color: white;
  border: none;
  padding: 10px 15px;
  cursor: pointer;
}
Basic element selector overrides.
2. Using Class or ID Selectors (Higher Specificity)
When user agent styles are more persistent or you need to apply specific styles to certain instances of an element, using class or ID selectors provides higher specificity, ensuring your rules take precedence.
/* Override default link color for a specific class */
a.primary-link {
  color: #28a745;
  text-decoration: none;
}

/* Style a specific button with an ID */
#submit-button {
  font-weight: bold;
  border-radius: 5px;
}
Using class and ID selectors for more specific overrides.
3. The Universal Reset (Caution Advised)
A common practice in web development is to use a CSS reset or normalize stylesheet. These stylesheets aim to reduce browser inconsistencies by resetting default styles for many elements to a consistent baseline. While powerful, a full reset can sometimes be overkill and might remove useful default styles you didn't intend to touch.
/* A very basic universal reset */
* {
  margin: 0;
  padding: 0;
  box-sizing: border-box;
}

/* Example from Normalize.css for body */
body {
  margin: 0;
}
Examples of universal reset and normalize styles.
!important should be a last resort. It breaks the natural cascade and makes CSS harder to maintain and debug. Only use it when absolutely necessary, for example, to override inline styles or third-party library styles you cannot modify directly.4. Using !important (Use with Extreme Caution)
The !important declaration gives a style rule ultimate precedence, overriding any other declaration regardless of specificity or order. While effective, its overuse can lead to 'CSS wars' and make your stylesheets very difficult to manage. It's generally considered bad practice for overriding user agent styles unless there's no other way.
/* Overriding a style with !important (generally discouraged) */
p {
  margin-bottom: 0 !important;
}
Example of using !important.
By understanding the cascade and specificity, and by leveraging Chrome DevTools, you can effectively manage and override user agent styles to achieve the precise look and feel you desire for your web applications. Prioritize using more specific selectors over !important for cleaner, more maintainable CSS.