Is There a Way to Run Kindle Fire Emulator on OS X Mavericks?
Categories:
Running Kindle Fire Emulators on OS X Mavericks: A Comprehensive Guide

Explore the challenges and solutions for setting up and running Kindle Fire emulators on OS X Mavericks, focusing on Android Virtual Device (AVD) configurations and common pitfalls.
Developing applications for Amazon's Kindle Fire devices often requires testing on an emulator. While Android Studio's AVD Manager provides robust tools for creating virtual devices, configuring them specifically for Kindle Fire on older operating systems like OS X Mavericks can present unique challenges. This article will guide you through the process, highlight potential issues, and offer solutions to get your Kindle Fire emulator up and running.
Understanding Kindle Fire Emulation Requirements
Kindle Fire devices run a customized version of Android, often referred to as Fire OS. To emulate these devices accurately, you need to configure an Android Virtual Device (AVD) with specific hardware and software profiles that mimic the target Kindle Fire model. This includes selecting the correct Android API level, screen resolution, RAM, and other device characteristics. On OS X Mavericks, compatibility with newer Android SDK components can sometimes be an issue, requiring careful selection of SDK versions.
flowchart TD
    A[Start: Identify Target Kindle Fire Model] --> B{Check Amazon's Device Specifications}
    B --> C[Note API Level, Screen Size, RAM, CPU Architecture]
    C --> D[Open Android Studio AVD Manager]
    D --> E{Create New Virtual Device}
    E --> F[Select 'Phone' or 'Tablet' Category]
    F --> G[Choose Generic Hardware Profile (e.g., 'Nexus 7' for tablets)]
    G --> H[Select System Image (API Level matching Kindle Fire)]
    H --> I[Configure AVD Properties (RAM, Heap, SD Card, etc.)]
    I --> J{Verify Settings Against Kindle Specs}
    J --> K[Launch AVD]
    K --> L[End: Emulator Running]
General Workflow for Setting Up a Kindle Fire Emulator
Setting Up Your Android Virtual Device (AVD) for Kindle Fire
The core of Kindle Fire emulation lies in correctly configuring an AVD. Since Amazon doesn't provide official Kindle Fire AVD images, you'll need to create a generic Android emulator and then adjust its settings to closely match a Kindle Fire device. This involves selecting an appropriate device definition and system image, then customizing the hardware profile. For OS X Mavericks, ensure your Android SDK Tools and Platform-tools are up-to-date, but be mindful of potential incompatibilities with very recent versions that might require a newer macOS.
1. Install Android Studio and SDK
Ensure you have Android Studio installed on your OS X Mavericks system. Use the SDK Manager within Android Studio to download the necessary Android SDK Platform-tools and an Android API level that corresponds to your target Kindle Fire device (e.g., API 19 for Fire OS 4, API 22 for Fire OS 5).
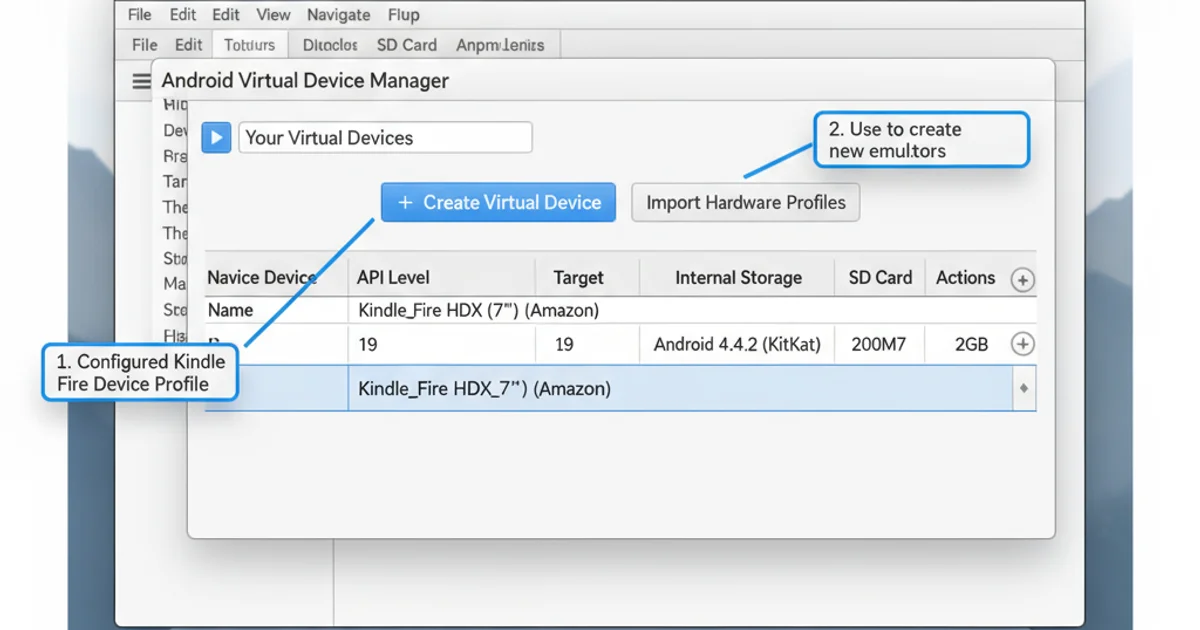
2. Open AVD Manager
Launch Android Studio and navigate to Tools > AVD Manager.
3. Create a New Virtual Device
Click the Create Virtual Device... button. For Kindle Fire, you'll typically select a Phone or Tablet category. Choose a generic device definition that has a similar screen size and density to your target Kindle Fire model (e.g., Nexus 7 or Nexus 10 for tablets, or a generic phone profile for smaller Kindle Fires).
4. Select System Image
Choose a system image (Android version) that is close to the Fire OS version you are targeting. For example, if you're targeting Fire OS 5, which is based on Android 5.1 (API 22), select an API 22 system image. Prefer x86 or x86_64 images for better performance with HAXM.
5. Configure AVD Properties
On the 'Verify Configuration' screen, click Show Advanced Settings. Adjust the following:
- RAM: Set this to match or be slightly less than your target Kindle Fire (e.g., 1024MB for many models).
- Internal Storage: Allocate sufficient space.
- SD Card: Consider adding an SD card if your app uses external storage.
- Emulated Performance: Ensure
Graphicsis set toHardware - GLES 2.0for better rendering performance. If available, enableHAXMforCPU/ABIacceleration.
6. Launch the Emulator
Click Finish to create the AVD, then select it in the AVD Manager and click the Play button to launch it. Be patient, as the first boot can take some time.
Common Issues and Troubleshooting on OS X Mavericks
Running emulators on an older OS like Mavericks can introduce specific problems. Compatibility with newer Android SDK components, HAXM installation issues, and resource limitations are frequent hurdles. Always check the Android Studio event log for detailed error messages.

Android Studio AVD Manager interface.
Here are some common issues and their potential solutions:
Verifying Your Kindle Fire Emulator Setup
Once your emulator is running, you'll want to verify that it behaves like a Kindle Fire. While you won't have the full Fire OS UI, you can install Amazon's Appstore and other Amazon services to get a closer experience. This usually involves sideloading the Amazon Appstore APK onto your emulator.
1. Download Amazon Appstore APK
Search online for 'Amazon Appstore APK' and download a reliable version. Ensure it's compatible with the Android API level of your emulator.
2. Install APK via ADB
Open your terminal and navigate to your Android SDK platform-tools directory. With your emulator running, use the following command to install the APK:
./adb install /path/to/your/AmazonAppstore.apk
3. Test Your Application
Deploy your application to the emulator from Android Studio and test its functionality, paying close attention to UI elements, performance, and any Kindle Fire-specific features you might be using.