How can I add a signature to an email message in New Outlook
Categories:
Adding and Managing Signatures in New Outlook

Learn how to create, customize, and apply email signatures in the New Outlook experience for a professional touch to your communications.
Email signatures are a crucial part of professional communication, providing contact information, branding, and a consistent closing to your messages. The 'New Outlook' experience, available for Windows and macOS, introduces a streamlined interface for managing these signatures. This guide will walk you through the process of creating, editing, and assigning signatures to your email accounts, ensuring your messages always leave a polished impression.
Understanding Signature Management in New Outlook
The New Outlook simplifies signature management by centralizing all signature-related settings. Unlike older versions where signatures might be tied to specific profiles or complex HTML files, New Outlook integrates signature creation directly into its settings menu. You can create multiple signatures and assign a default signature for new messages and replies/forwards for each email account you have configured.
flowchart TD
    A[Start: Open New Outlook] --> B{Access Settings}
    B --> C["Click 'Settings' icon (Gear icon)"]
    C --> D["Select 'Accounts' > 'Email signatures'"]
    D --> E{Manage Signatures}
    E --> F[Create New Signature]
    E --> G[Edit Existing Signature]
    E --> H[Set Default for New Messages]
    E --> I[Set Default for Replies/Forwards]
    F --> J[Input Signature Details]
    G --> J
    J --> K[Save Changes]
    K --> L[End: Signature Ready for Use]
Workflow for managing email signatures in New Outlook.
Creating and Customizing Your Email Signature
New Outlook provides a rich text editor that allows for basic formatting, including font styles, sizes, colors, and the insertion of links and images. While it's not a full HTML editor, it's sufficient for most professional needs. Consider including your name, title, company, contact information, and a company logo for a comprehensive signature.
1. Access Signature Settings
In New Outlook, click the Settings icon (gear icon) in the top right corner. From the dropdown menu, select Accounts > Email signatures.
2. Create a New Signature
In the 'Email signatures' window, click the + New signature button. Give your signature a descriptive name (e.g., 'Professional Signature', 'Personal Signature').
3. Design Your Signature
Use the rich text editor to type and format your signature content. You can add text, change fonts, sizes, and colors. To insert an image (like a company logo), click the picture icon and browse for your image file. You can also add hyperlinks by selecting text and clicking the link icon.
4. Set Default Signatures
For each email account listed, use the dropdown menus under 'Choose default signatures' to select which signature should be used for New messages and which for Replies/forwards. You can choose 'No signature' if preferred.
5. Save Your Changes
Once you're satisfied with your signature and default settings, click the Save button. Your new signature is now ready to be used.
Using Your Signature in Email Messages
Once your signature is set up, it will automatically appear in new messages or replies/forwards based on your default settings. If you have multiple signatures, you can easily switch between them while composing an email.
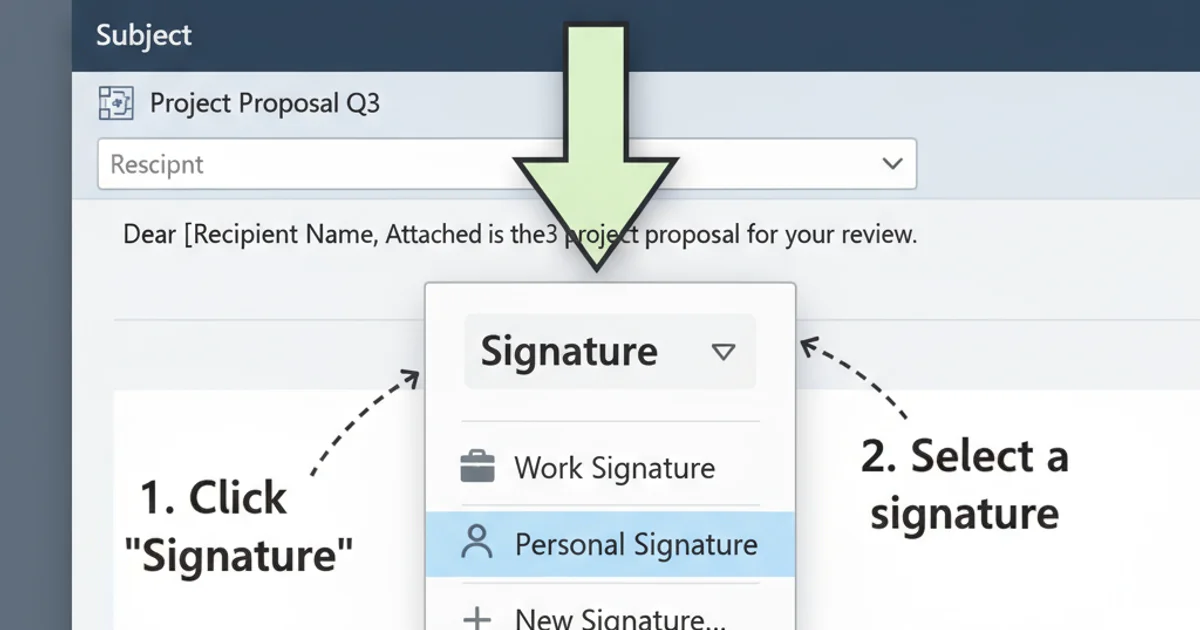
Selecting a different signature from the dropdown menu in a new email.
When composing a new email or replying to one, look for the Signature button in the ribbon or the three dots (...) menu. Clicking this will reveal a list of your saved signatures, allowing you to select a different one if needed, or to remove the current signature.