How do I change the editor's default font to a font that's installed on the system?
Categories:
Customizing Your Editor's Default Font in NetBeans and MPLAB X
Learn how to change the default editor font in NetBeans 6.9 and MPLAB X IDE to any font installed on your system, enhancing readability and coding comfort.
The default font in your IDE can significantly impact readability and your overall coding experience. While many IDEs come with sensible defaults, personal preference or specific project requirements might necessitate a change. This article will guide you through the process of changing the default editor font in NetBeans 6.9 and MPLAB X IDE to any font available on your operating system. This customization can help reduce eye strain and make your coding environment more comfortable and productive.
Understanding IDE Font Configuration
Integrated Development Environments (IDEs) like NetBeans and MPLAB X typically manage font settings through their options or preferences menus. These settings allow you to select from a list of installed fonts on your system. It's important to distinguish between the IDE's UI font and the editor's code font; usually, you'll want to change the latter for coding purposes. The process is generally straightforward, involving navigation through menus and selecting your desired font and size.
flowchart TD
    A[Start] --> B{Open IDE};
    B --> C{Navigate to 'Tools' Menu};
    C --> D{Select 'Options' (or 'Preferences' on Mac)};
    D --> E{Go to 'Fonts & Colors' Tab};
    E --> F{Select 'Default' Category};
    F --> G{Click '...' Button next to Font Field};
    G --> H{Choose Desired Font and Size};
    H --> I{Click 'OK' to Confirm};
    I --> J{Apply Changes};
    J --> K[End];
General Workflow for Changing Editor Fonts in IDEs
Changing Font in NetBeans 6.9
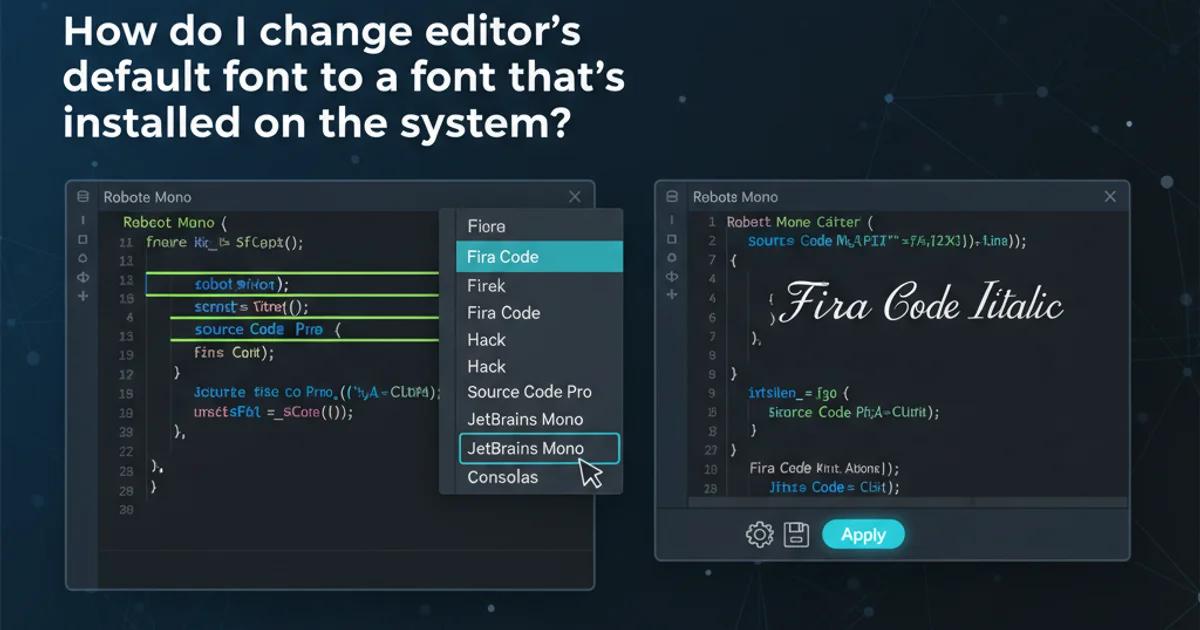
NetBeans 6.9 provides a clear path to customize the editor's font. You can select any monospaced font installed on your system to ensure proper alignment of code. This change will affect all code files opened within the NetBeans editor.
1. Open Options
Launch NetBeans 6.9. Go to Tools > Options (on Windows/Linux) or NetBeans > Preferences (on macOS).
2. Navigate to Fonts & Colors
In the Options dialog, select the Fonts & Colors tab from the top menu.
3. Select Default Category
Under the Syntax tab within Fonts & Colors, ensure Category is set to Default.
4. Choose New Font
Click the ... button next to the Font field. A font selection dialog will appear. Choose your desired font (e.g., 'Consolas', 'Fira Code', 'JetBrains Mono') and font size. Click OK.
5. Apply Changes
Click Apply and then OK in the Options dialog to save your changes. The editor font will update immediately.
Changing Font in MPLAB X IDE
MPLAB X IDE, being based on NetBeans, shares a very similar configuration process for changing editor fonts. This consistency makes it easy for users familiar with NetBeans to customize MPLAB X as well.
1. Access Options
Open MPLAB X IDE. Go to Tools > Options (on Windows/Linux) or MPLAB X IDE > Preferences (on macOS).
2. Locate Fonts & Colors
In the Options dialog, click on the Fonts & Colors icon or tab.
3. Set Default Font
Under the Syntax tab, ensure Category is set to Default. Click the ... button next to the Font field.
4. Select Font and Size
From the font selection dialog, choose your preferred monospaced font and size. Click OK.
5. Confirm and Apply
Click Apply and then OK in the Options dialog to save your settings. The editor font will be updated.
Troubleshooting and Best Practices
Sometimes, after changing a font, you might encounter issues like incorrect rendering or missing characters. This usually happens if the chosen font doesn't support all the characters used in your code (e.g., specific symbols or international characters). Always test your new font with various code files to ensure full compatibility. If you experience problems, revert to a known good font or try another monospaced option.
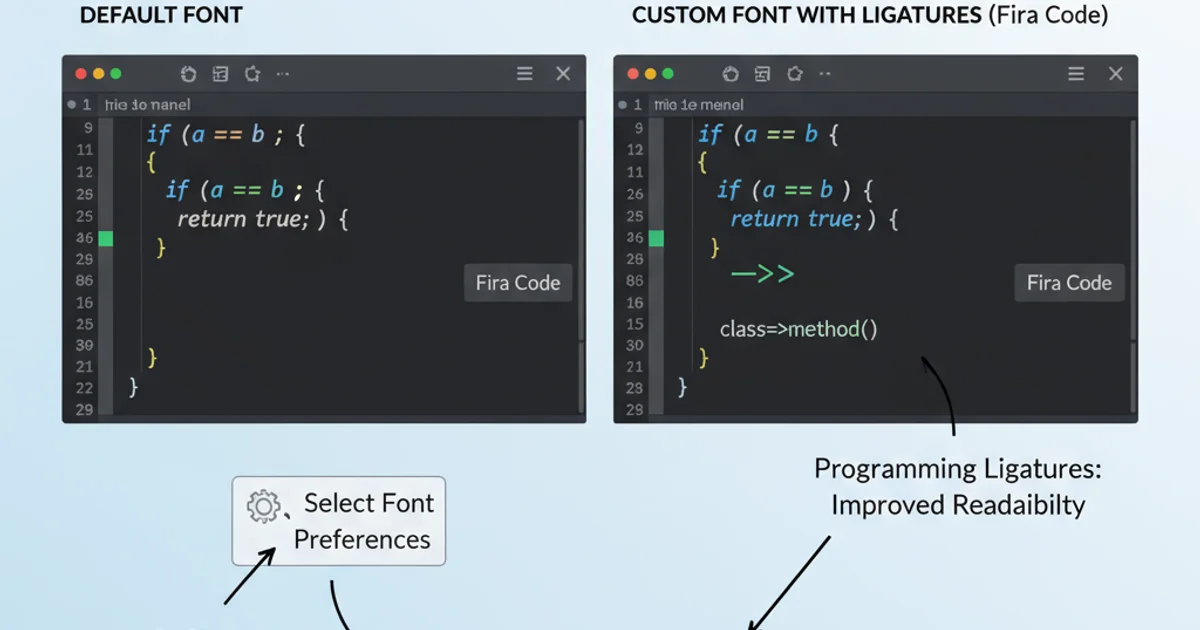
Example of a custom font (Fira Code) with programming ligatures in an editor.