Can I copy a storyboard from one project to another project?
Categories:
Copying Storyboards Between Xcode Projects
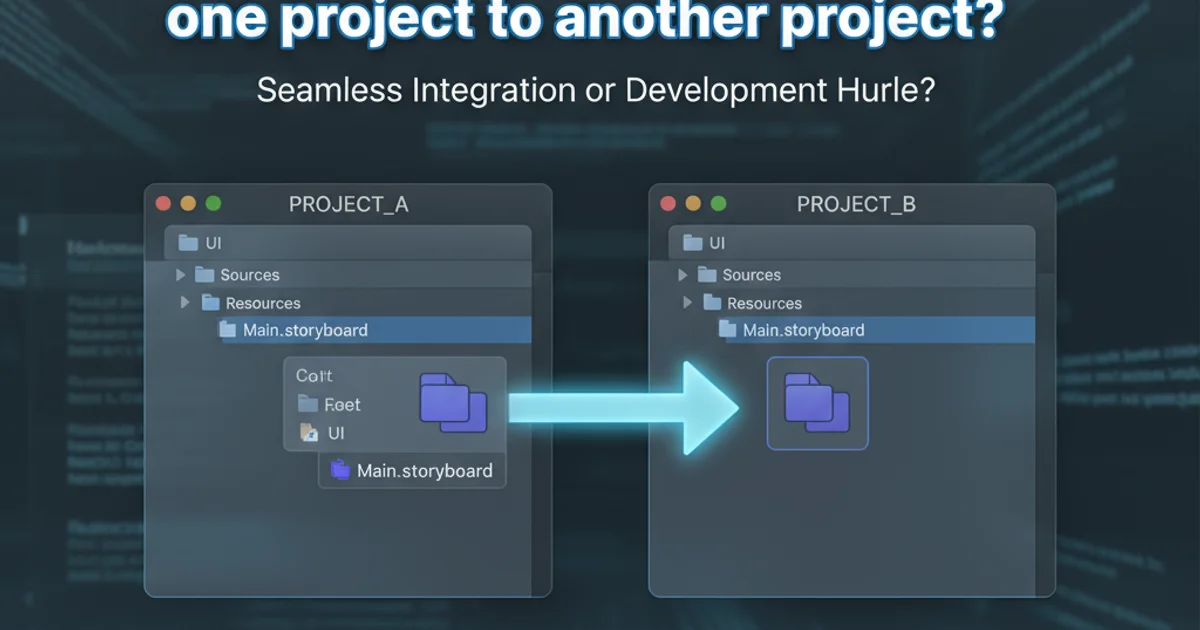
Learn how to effectively transfer storyboards, including their associated view controllers and assets, from one Xcode project to another. This guide covers manual methods and best practices for maintaining project integrity.
Xcode projects often evolve, and sometimes, components developed in one project need to be reused in another. Storyboards, which define the user interface flow and view controller hierarchy, are prime candidates for such reuse. While Xcode doesn't offer a direct 'copy-paste' function for entire storyboards across projects, there are effective manual methods to achieve this. This article will guide you through the process, ensuring you transfer not just the storyboard file but also its essential dependencies.
Understanding Storyboard Dependencies
Before attempting to copy a storyboard, it's crucial to understand its dependencies. A storyboard is rarely a standalone file. It typically references custom UIViewController subclasses, custom UIView subclasses, images, and other assets. Simply copying the .storyboard file without its associated code and assets will likely result in a broken interface in the new project. You'll encounter 'Unknown class' errors or missing resources.
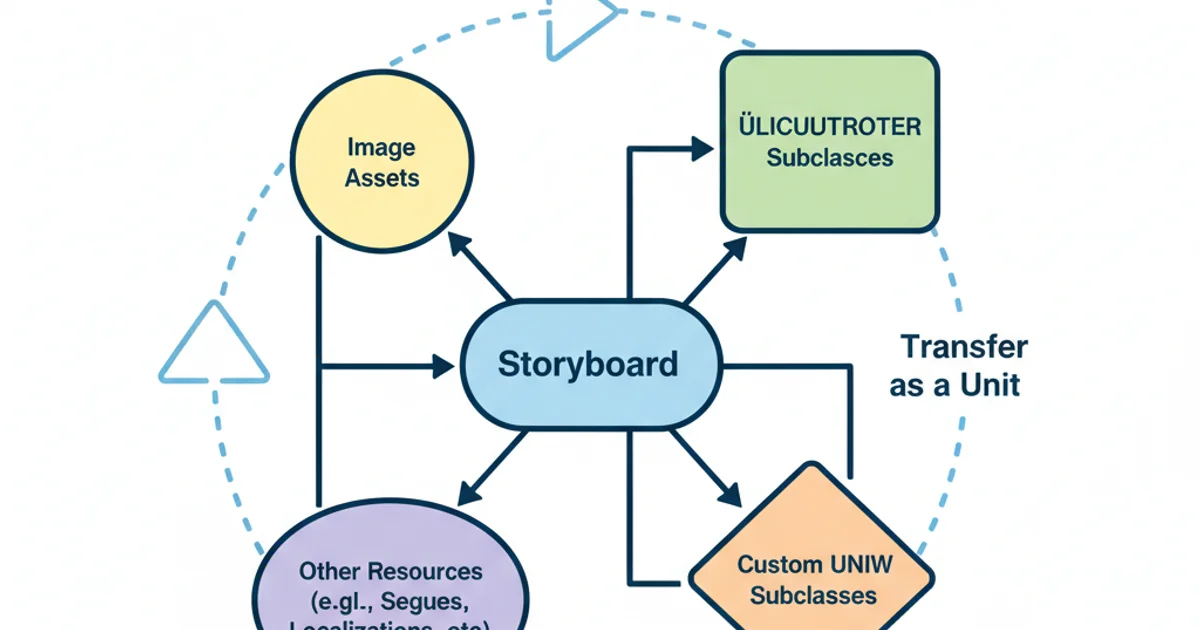
Storyboard dependencies that must be transferred together.
Method 1: Manual File Transfer and Integration
The most common and reliable method involves manually copying the necessary files and then integrating them into the new Xcode project. This gives you granular control over what gets transferred.
1. Identify and Copy Source Files
Open both the source and destination Xcode projects. In the source project, locate the .storyboard file you wish to copy. Identify all custom UIViewController and UIView subclasses that are used within that storyboard. Also, note any image assets or other resources (e.g., custom fonts, sound files) directly referenced by the storyboard or its view controllers. Copy all these identified files (the .storyboard file, .swift or .m/.h files for custom classes, and asset files) from their respective folders in your file system.
2. Add Files to Destination Project
In the destination Xcode project, navigate to the desired group in the Project Navigator. Drag and drop the copied files into this group. When prompted, ensure 'Copy items if needed' is checked, and select the appropriate target(s) for the files. This adds the files to your project and copies them into the project's directory structure.
3. Verify Target Membership
After adding the files, select each new file in the Project Navigator. In the File Inspector (right-hand pane), verify that the correct target(s) are checked under 'Target Membership'. This ensures the files are compiled and included in your application bundle.
4. Update Project Settings (if necessary)
If the storyboard you copied is intended to be the main storyboard for the new project, you'll need to update the project settings. Go to your project's settings (click on the project in the Project Navigator), select your application target, and under the 'General' tab, set the 'Main Interface' dropdown to the name of your newly added storyboard (e.g., MyCopiedStoryboard).
5. Resolve Compilation Errors
Build your project (Cmd + B). You may encounter compilation errors, especially if there are missing imports, undeclared identifiers, or issues with asset catalogs. Address these errors by ensuring all necessary frameworks are linked, all custom classes are correctly imported, and all assets are present in the destination project's asset catalog.
Method 2: Using a Shared Framework or SPM Package
For more complex or frequently reused UI components, packaging your storyboard and its associated code into a reusable framework or Swift Package Manager (SPM) package is a more robust solution. This promotes modularity and easier maintenance.
- Create a Framework/SPM Package: Create a new Xcode project of type 'Framework' or set up a new Swift Package. Move your storyboard and its related view controllers/views into this new module.
- Embed Resources: Ensure your storyboard and any assets are correctly bundled within the framework/package. For frameworks, this often means adding them to the framework target's 'Copy Bundle Resources' build phase. For SPM, resources are typically declared in the
Package.swiftfile. - Integrate the Module: Add the framework or SPM package as a dependency to your main application project. This makes the storyboard and its classes accessible.
- Instantiate Storyboard: You can then instantiate the storyboard from its bundle within your application code:
let bundle = Bundle(for: MyCustomViewController.self) // Or Bundle(identifier: "com.yourcompany.YourFramework")
let storyboard = UIStoryboard(name: "MyCopiedStoryboard", bundle: bundle)
let viewController = storyboard.instantiateViewController(withIdentifier: "MyViewControllerIdentifier")
// Present or push the view controller
Instantiating a storyboard from a framework bundle.
Considerations for Assets and Localizations
When copying storyboards, don't forget about assets and localizations:
- Asset Catalogs: If your storyboard or view controllers reference images from an asset catalog (
.xcassets), you'll need to copy those assets into the destination project's asset catalog. You can drag and drop entire.xcassetsfolders or individual image sets. - Localizations: If your storyboard is localized, you'll have
.stringsfiles associated with it (e.g.,Main.strings (English)). These files also need to be copied and added to the destination project, ensuring their target membership is correct. Xcode will automatically pick up the localized strings if the files are correctly placed and configured.